Introduction to PCB Prototypes
PCB prototypes are essential in the electronics industry for testing and validating circuit designs before mass production. They allow engineers and designers to ensure that their boards function as intended, and make any necessary adjustments or improvements. In this article, we will explore the process of manufacturing and assembling PCB prototypes, specifically focusing on the 3+3 approach.
What are PCB Prototypes?
PCB prototypes are physical representations of printed circuit board designs, created to test and validate the functionality, performance, and reliability of the circuit before mass production. These prototypes are typically made in small quantities and are used for various purposes, such as:
- Testing and debugging circuit designs
- Evaluating component placement and layout
- Assessing signal integrity and power distribution
- Verifying mechanical fit and form factor
- Demonstrating proof-of-concept to stakeholders
The Importance of PCB Prototypes
Creating PCB prototypes is a crucial step in the electronics design process for several reasons:
- Cost-effective: Prototyping allows designers to identify and fix issues early in the development cycle, reducing the risk of costly mistakes during mass production.
- Time-saving: By validating the design through prototypes, designers can avoid potential delays caused by redesigns and modifications later in the process.
- Performance optimization: Prototypes enable designers to fine-tune the circuit’s performance, ensuring that it meets the desired specifications and requirements.
- Stakeholder engagement: Physical prototypes can be used to demonstrate the design’s functionality and feasibility to stakeholders, facilitating better communication and decision-making.
The 3+3 Approach to PCB Prototyping
The 3+3 approach is a popular method for manufacturing and assembling PCB prototypes, which involves creating three bare boards and assembling components on three of them. This approach offers several advantages, including:
- Redundancy: Having three assembled boards provides redundancy, ensuring that if one board fails, there are still two functional prototypes available for testing and evaluation.
- Bare board testing: The three unassembled boards can be used for bare board testing, allowing designers to assess the quality and integrity of the PCB fabrication process.
- Flexibility: With three assembled prototypes, designers can perform various tests and experiments simultaneously, accelerating the validation process.
Step 1: PCB Design and Layout
The first step in creating PCB prototypes is to design the circuit schematic and layout using electronic design automation (EDA) software. During this stage, designers must consider factors such as:
- Component selection and placement
- Signal routing and impedance control
- Power distribution and decoupling
- Electromagnetic compatibility (EMC) and signal integrity
- Mechanical constraints and form factor
Step 2: PCB Fabrication
Once the design is finalized, the PCB fabrication process begins. This involves several sub-steps:
- Gerber file generation: The EDA software generates Gerber files, which contain the necessary information for PCB fabrication, such as copper layers, solder mask, and silkscreen.
- Material selection: The appropriate PCB substrate material is chosen based on the design requirements, such as FR-4, Rogers, or aluminum.
- Copper deposition: Copper is deposited onto the substrate material using techniques like electroplating or foil lamination.
- Etching: Unwanted copper is removed from the board using a chemical etching process, leaving only the desired traces and pads.
- Drilling: Holes are drilled into the board for through-hole components and vias.
- Solder mask application: A protective solder mask layer is applied to the board, exposing only the areas where components will be soldered.
- Silkscreen printing: Text, logos, and component identifiers are printed onto the board using silkscreen printing.
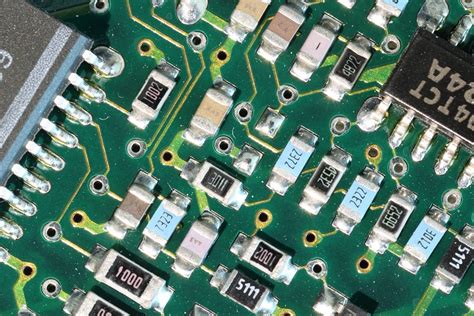
Step 3: PCB Assembly
After the bare boards are fabricated, three of them undergo the assembly process, which involves:
- Solder paste application: Solder paste is applied to the pads on the board using a stencil or screen printing process.
- Component placement: Surface mount components are placed onto the solder paste using pick-and-place machines or manual assembly.
- Reflow soldering: The board is heated in a reflow oven, melting the solder paste and creating a permanent electrical and mechanical connection between the components and the board.
- Through-hole component insertion: If the design includes through-hole components, they are manually inserted and soldered onto the board.
- Inspection and testing: The assembled boards are visually inspected and tested to ensure proper component placement and functionality.
Step 4: Prototype Validation and Testing
With the three assembled PCB prototypes ready, designers can begin the validation and testing process, which may include:
- Power-on testing: Verifying that the board powers on and functions as expected without any short circuits or component failures.
- Functional testing: Assessing the board’s performance and functionality against the design specifications and requirements.
- Signal integrity testing: Measuring and analyzing signal quality, timing, and impedance to ensure proper operation and reliability.
- Environmental testing: Subjecting the prototypes to various environmental conditions, such as temperature, humidity, and vibration, to evaluate their durability and reliability.
- Compliance testing: Verifying that the prototypes meet relevant industry standards and regulations, such as FCC, CE, or UL.

Benefits of the 3+3 Approach
The 3+3 approach to PCB prototyping offers several benefits for designers and engineers:
- Risk reduction: By having three assembled prototypes, designers can mitigate the risk of a single prototype failure impacting the entire validation process.
- Comprehensive testing: With multiple prototypes, designers can conduct various tests simultaneously, providing a more comprehensive understanding of the board’s performance and reliability.
- Faster time-to-market: The 3+3 approach allows for parallel testing and validation, potentially reducing the overall development time and enabling faster time-to-market.
- Cost-effectiveness: Although producing six boards (three bare and three assembled) may initially seem more expensive, the benefits of redundancy, comprehensive testing, and risk reduction can ultimately lead to cost savings by avoiding potential issues during mass production.

Choosing a PCB Prototype Manufacturer
When selecting a PCB prototype manufacturer, consider the following factors:
- Experience and expertise: Look for a manufacturer with a proven track record in producing high-quality PCB prototypes for a variety of industries and applications.
- Technology and capabilities: Ensure that the manufacturer has the necessary equipment, processes, and materials to meet your specific design requirements, such as multi-layer boards, high-density interconnects, or advanced packaging techniques.
- Turnaround time: Consider the manufacturer’s lead times and delivery options to ensure that your prototypes are delivered within your project timeline.
- Customer support: Choose a manufacturer that offers responsive and knowledgeable customer support, including design review, technical assistance, and troubleshooting.
- Quality and reliability: Verify that the manufacturer adheres to strict quality control standards and has a robust testing and inspection process to ensure the reliability and consistency of your prototypes.

Frequently Asked Questions (FAQ)
1. What is the typical turnaround time for PCB prototypes?
The turnaround time for PCB prototypes can vary depending on the complexity of the design, the manufacturer’s capabilities, and the desired quantity. Typically, prototype lead times range from 24 hours to 2 weeks, with some manufacturers offering expedited services for faster delivery.
2. How much do PCB prototypes cost?
The cost of PCB prototypes depends on several factors, including the board size, layer count, material, quantity, and assembly requirements. Prototype costs can range from a few hundred to several thousand dollars, depending on the complexity of the design and the manufacturer’s pricing structure.
3. What file formats are required for PCB prototype fabrication?
Most PCB prototype manufacturers require Gerber files (RS-274X) for fabrication, which contain information about the copper layers, solder mask, silkscreen, and drill data. Some manufacturers may also accept other file formats, such as ODB++, IPC-2581, or Eagle board files.
4. Can I request specific materials or finishes for my PCB prototypes?
Yes, most PCB prototype manufacturers offer a range of materials and finishes to suit different design requirements. Common material options include FR-4, Rogers, aluminum, and flexible substrates. Finish options may include HASL, lead-free HASL, ENIG, OSP, and immersion silver or tin.
5. What assembly options are available for PCB prototypes?
PCB prototype manufacturers typically offer various assembly options, such as surface mount assembly (SMT), through-hole assembly, mixed assembly (SMT and through-hole), and manual assembly for low-volume or complex designs. Some manufacturers also provide turnkey services, including component procurement, testing, and packaging.
Conclusion
PCB prototypes are critical for validating and testing circuit designs before mass production. The 3+3 approach, which involves manufacturing three bare boards and assembling three prototypes, offers numerous benefits, including redundancy, comprehensive testing, and risk reduction. By carefully selecting a reputable PCB prototype manufacturer and following the steps outlined in this article, designers and engineers can ensure that their prototypes are manufactured and assembled to the highest standards, enabling them to bring their innovative electronic products to market faster and with greater confidence.
| Aspect | Description |
|---|---|
| PCB Design | Schematic and layout design using EDA software |
| PCB Fabrication | Gerber file generation, material selection, copper deposition, etching, drilling, solder mask application, and silkscreen printing |
| PCB Assembly | Solder paste application, component placement, reflow soldering, through-hole component insertion, inspection, and testing |
| Prototype Validation | Power-on testing, functional testing, signal integrity testing, environmental testing, and compliance testing |
| Benefits of 3+3 Approach | Risk reduction, comprehensive testing, faster time-to-market, and cost-effectiveness |


Leave a Reply